Roofers' Vent Installation Instructions
Click here to view the Installation Video
STEP #1)
ALWAYS CHECK LOCAL BUILDING CODES:
Before you purchase or install roof vents, make sure you check all local building codes regarding correct roof vent placement for your region.
STEP #2) PLANNING MINIMUM PITCH:
Type B box vents require a minimum 4/12 pitch on a shingled roof.
STEP #3) PLANNING # OF VENTS REQUIRED:
Building code requires a minimum of 1 sq ft of ventilation for every 300 sq ft of attic floor space.
Ventilation should be split 50/50 between intake and exhaust.
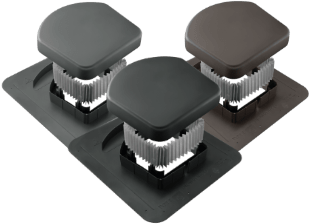
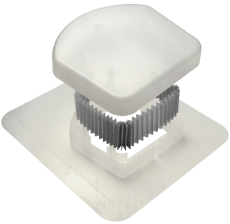
Each SNOWVENTCO Snow proof Roofers' Vent (intake or exhaust) has 50 sq inches of free air flow (Net Free Area)
Building code requires a vapor barrier between the attic deck and the living space if there is not at least 3ft of vertical height between the intake vents and the exhaust vents.
STEP #4) TOOLS REQUIRED:
Extension ladder (ensure to tie off on the roof)
Safety harness
Rubber sole shoes
Claw hammer
Shingle lifter / pry bar
Skill saw
Roofing nails
Measuring tape
Chalk line
Level
Roofing hook blade (to cut shingles)
STEP #5) VENT PLACEMENT:
Install exhaust vents 2ft from the roof peak
The intake vents should be placed a minimum 4 ft from the gable, 4 ft from the eaves
Evenly space the vents along the roof line ensuring not to cut into existing rafters.
Typically, vents can be discreetly placed on the backyard and garden sides of the structure. The more visible street side of the house can be left vent free.
OPTIONAL: Although not required, some roofers caulk each nail placement as well as the lower sides flange to the roof deck.
Disclaimer: Roofing can be dangerous. If you do not have the experience, please hire a professional.
THE SNOWVENTCO SNOWPROOF ROOFERS' EXHAUST VENT IS RECOMMENDED FOR INSTALLATION ON SLOPED ROOFS WITH A MINIMUM 4/12 PITCH WITHIN 2 FEET OF THE ROOF PEAK.
VENTS SHOULD NOT BE INSTALLED ON ASPHALT ROOFS HIGHER THAN FOUR STORIES.
DO NOT REMOVE HOOD FROM FLANGE.
THE ROOFERS' INTAKE VENT CAN BE INSTALLED LOWER ON THE ROOF.
CHECK YOUR LOCAL BUILDING CODES.
VENT IS NOT AVAILABLE IN CALIFORNIA.


Share On: